How do I set up Team (Table) Scoring on my Campaign?
Team scoring (renamed in October 2025, previously Table Scoring) is a great way to encourage friendly competition between teams/tables of guests at your event.
Please note: Scoring is available only within the leaderboard feature and is not a platform-wide feature.
Note: You may need to request activation to access this feature.
Check out this video or follow the steps below.
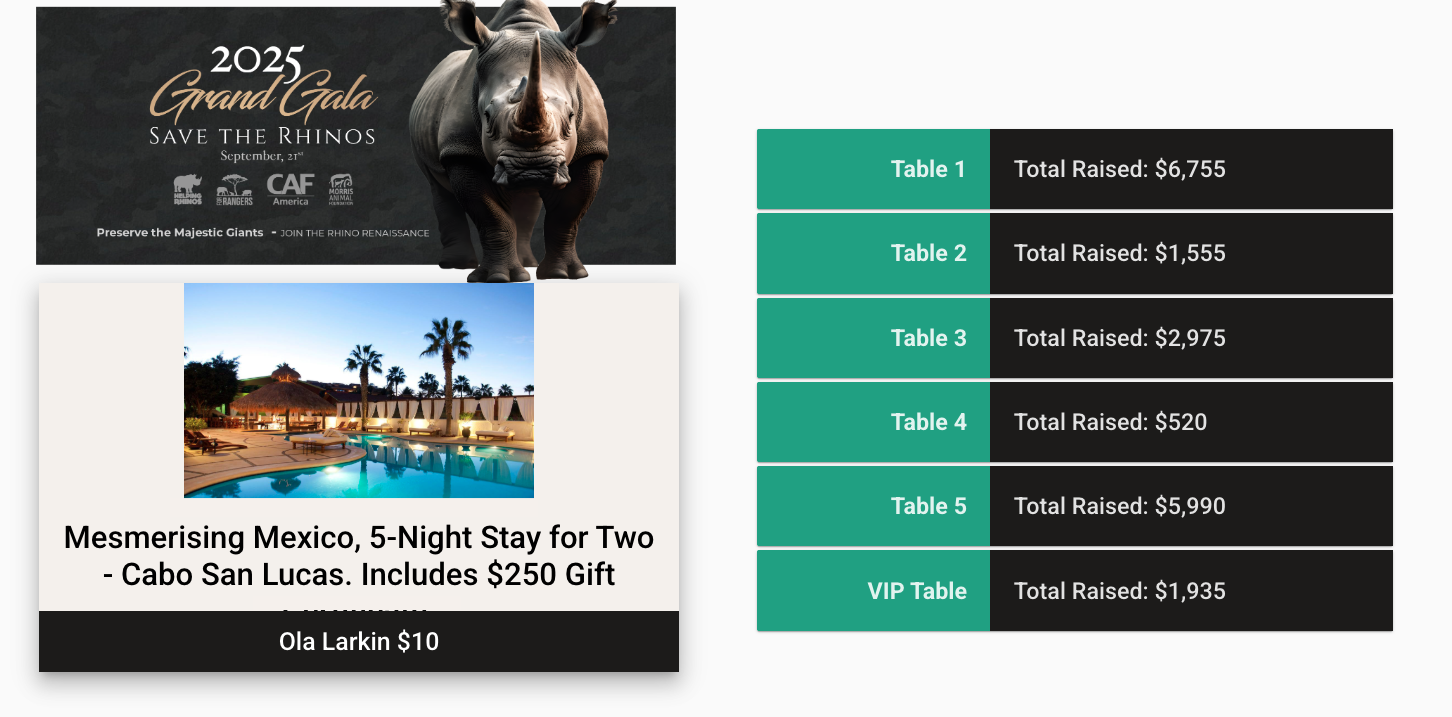
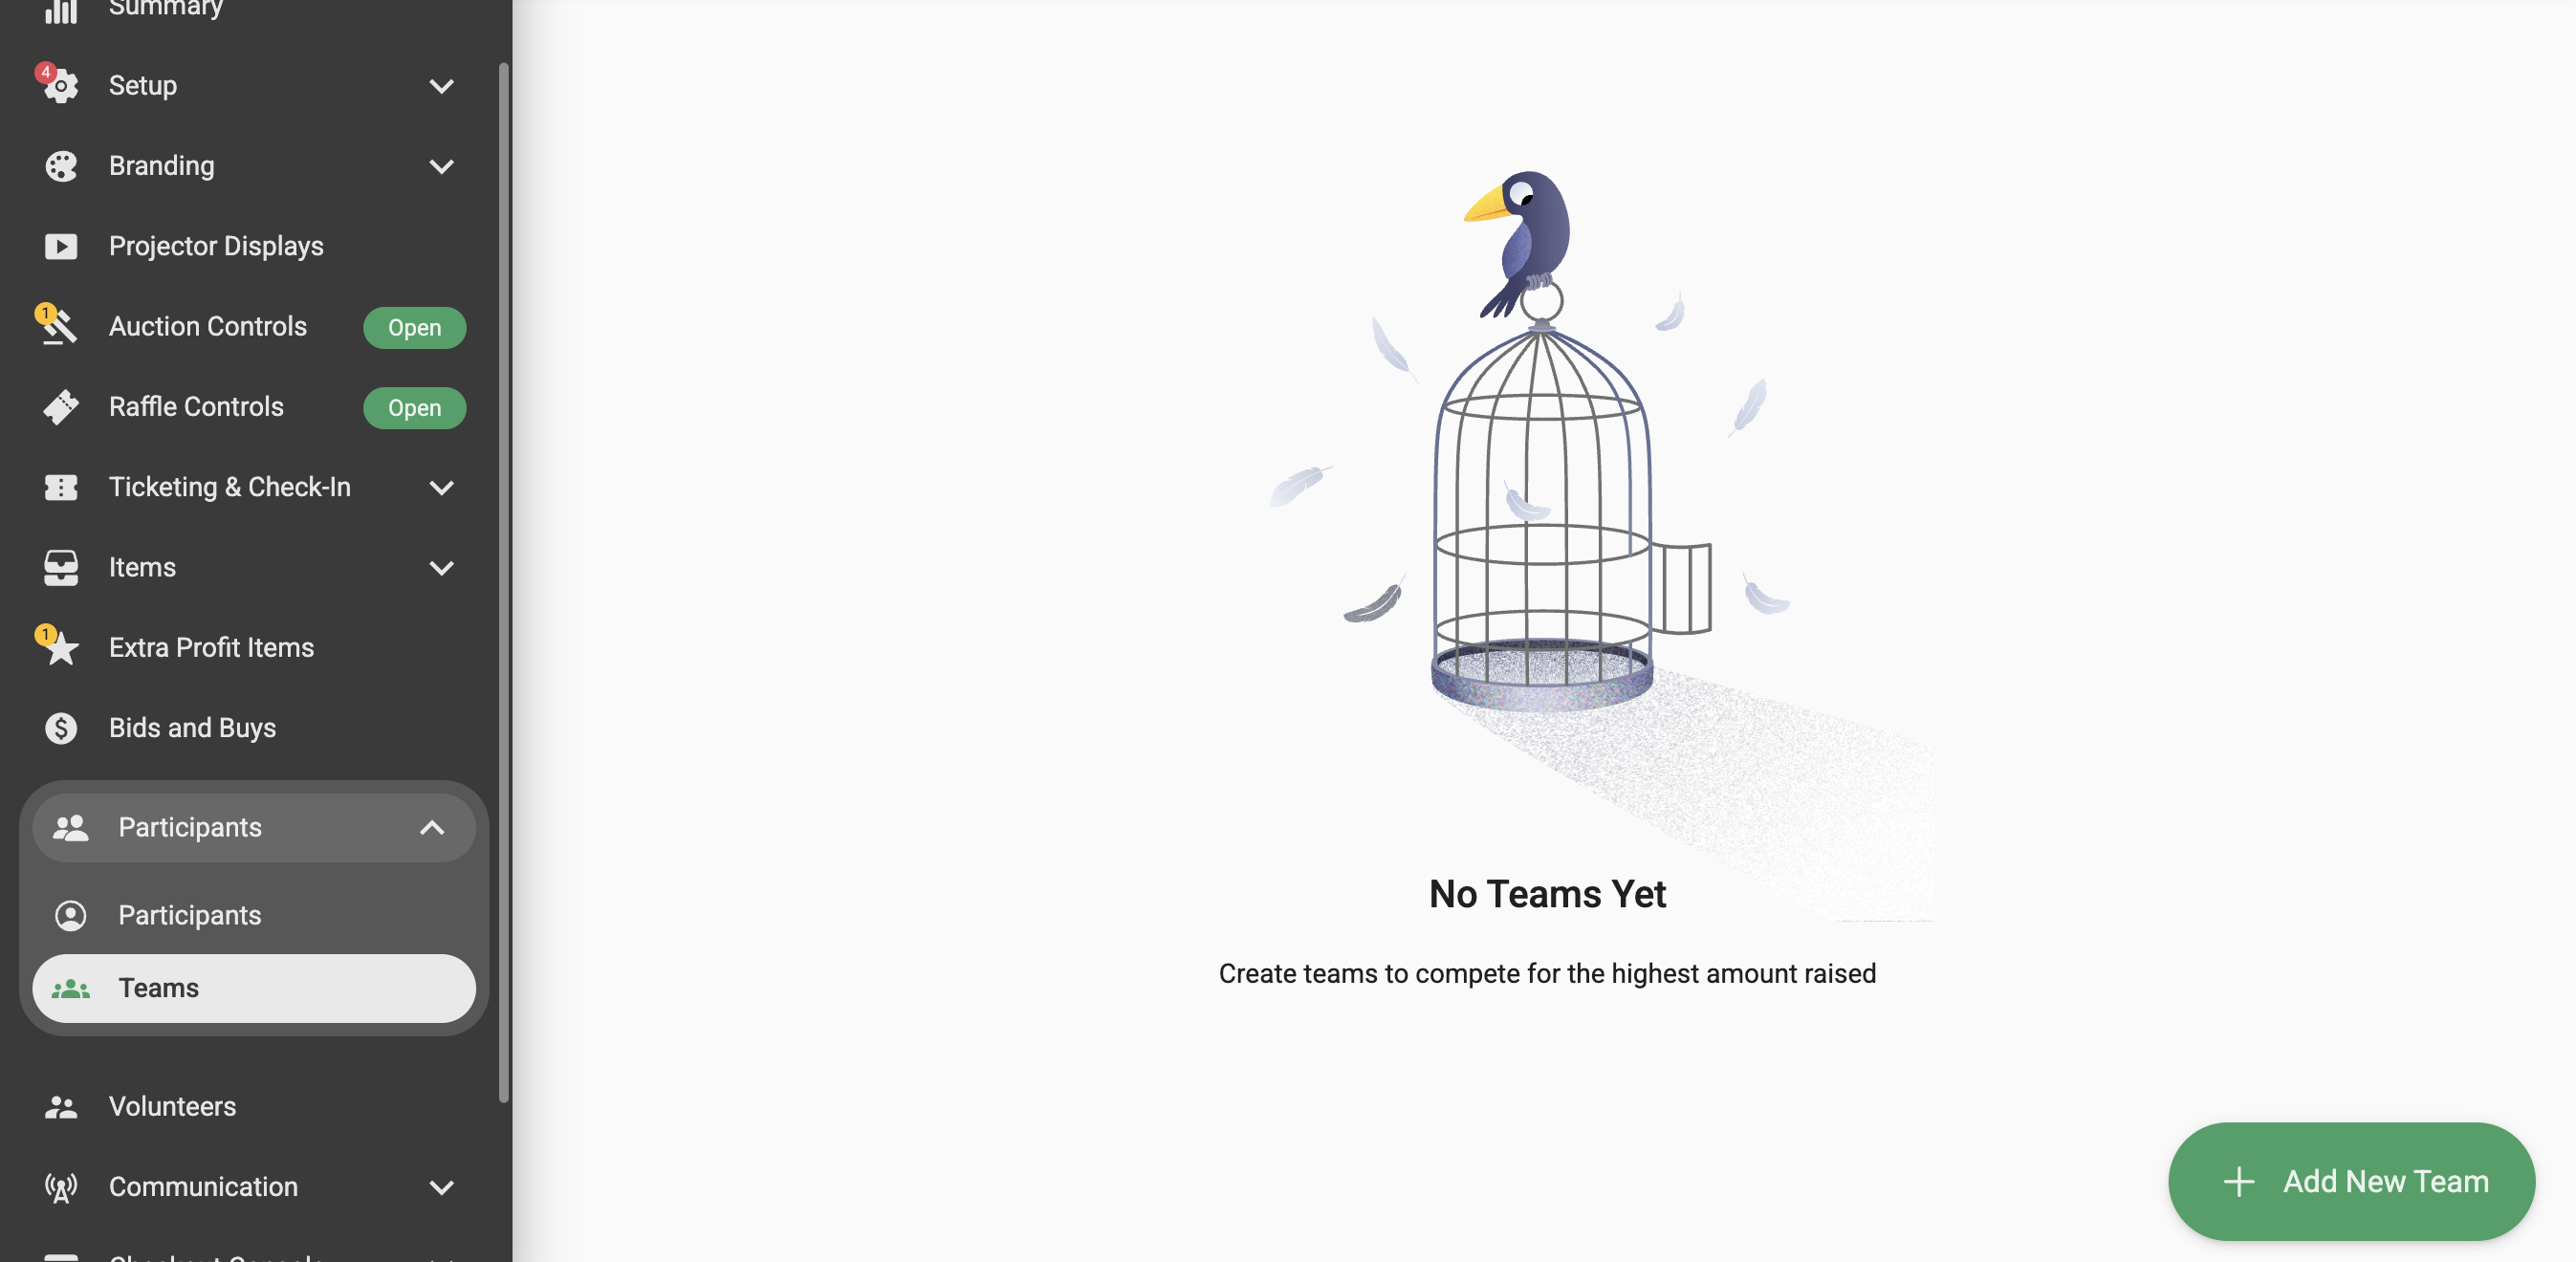
Step 1) Set up teams on your campaign dashboard, to do this navigate to the 'Participants' tab and select 'Teams' click 'Create Team' in the bottom right corner
Step 2) Name your Team and Add Participants.

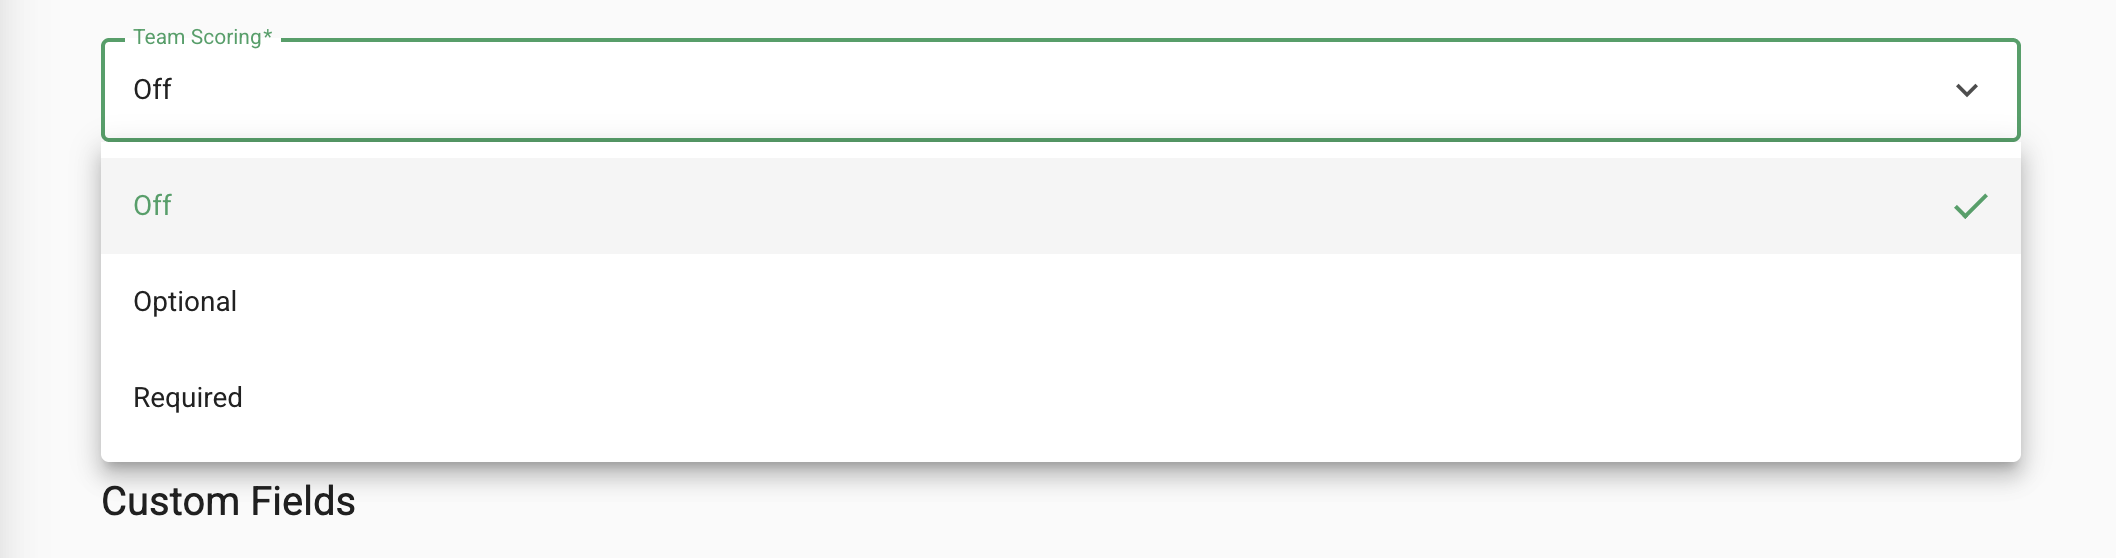
To have guests select their own teams when they register navigate to 'Setup' > 'Registration' and then enable the 'Table Name' field, you can set this to either 'Optional' or 'Required' and the click 'Save' in the bottom right corner.
Step 3) Now the Table Scoring projector needs to be created, to do this navigate to the 'Projector Displays' tab and click 'Add Projector' name your projector and then click the pencil icon to begin editing the projector.
Remove features that are no longer required by selecting the feature and clicking the trash icon on the tool bar.
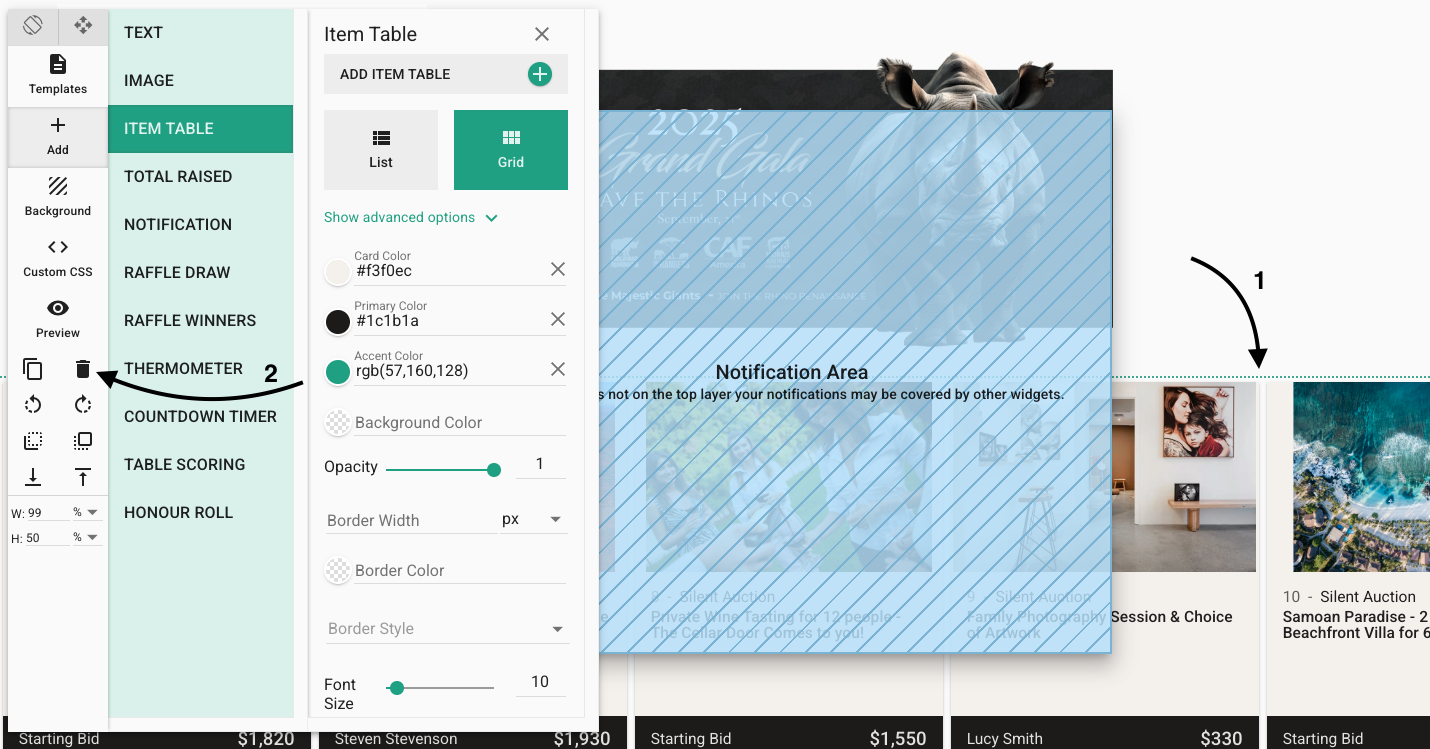
Arrange your projector by clicking and dragging the features, add in your table scoring using the tool bar and then adjust the sizes of the features displayed by editing the width and height section at the bottom of the tool bar.
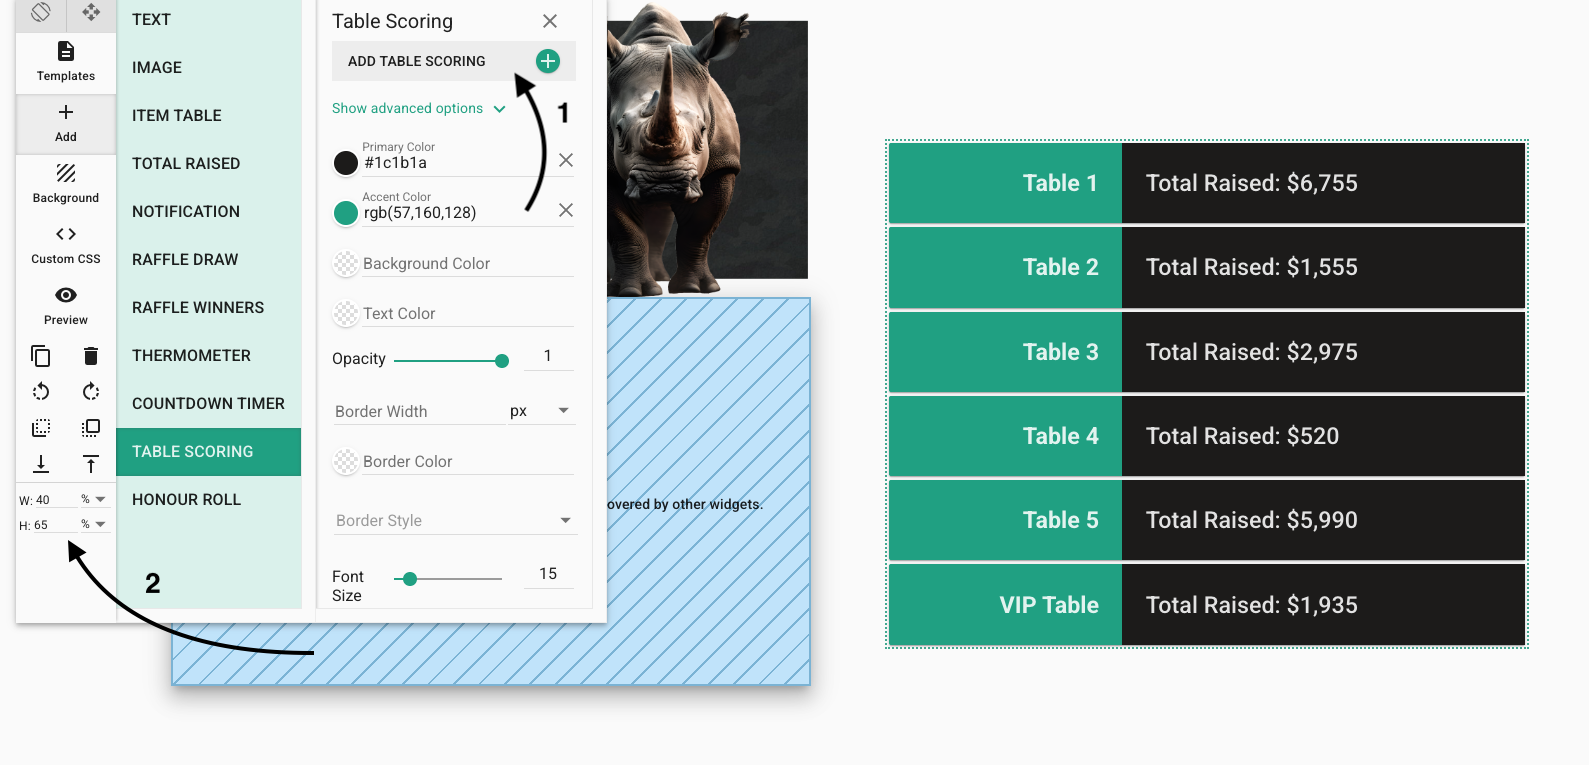
You can then further customize your projector by adding images, altering colours and adding a background.