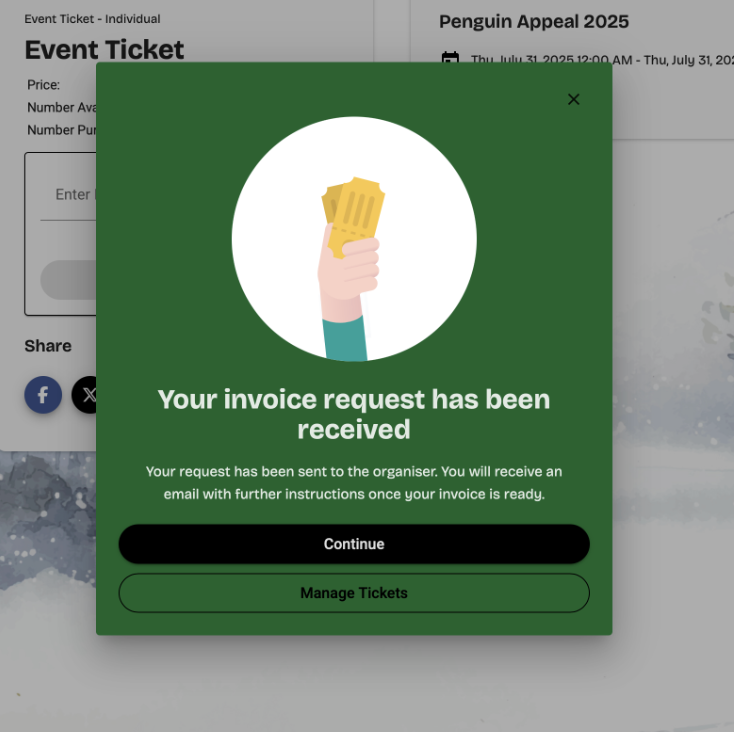
How to allow Ticket Purchasers to request an invoice?
You can allow individual or table ticket purchasers to request an invoice instead of making payment online. To do this request activation via the GalaBid team. You may need to upgrade your account to enable this feature.
Once the feature is enabled set up Payment Method called “Request Invoice” and then enable the feature on all relevant ticket items.
Note that the invoice itself is not generated by GalaBid. Admins generate and send the invoice outside of GalaBid.
Step 1: Enable “Request Invoice” as a Payment Method
1. In your Campaign Dashboard, go to the left-hand menu and click:
Setup → Payment
2. Scroll to the Payment Methods section and click:
+ Add Payment Method
In the new payment method form:
- Set Payment Process to: Request Invoice
- Enter a name (e.g. “Invoice Request” or “Pay Later”)
- Tick the box: Participants can use this payment method
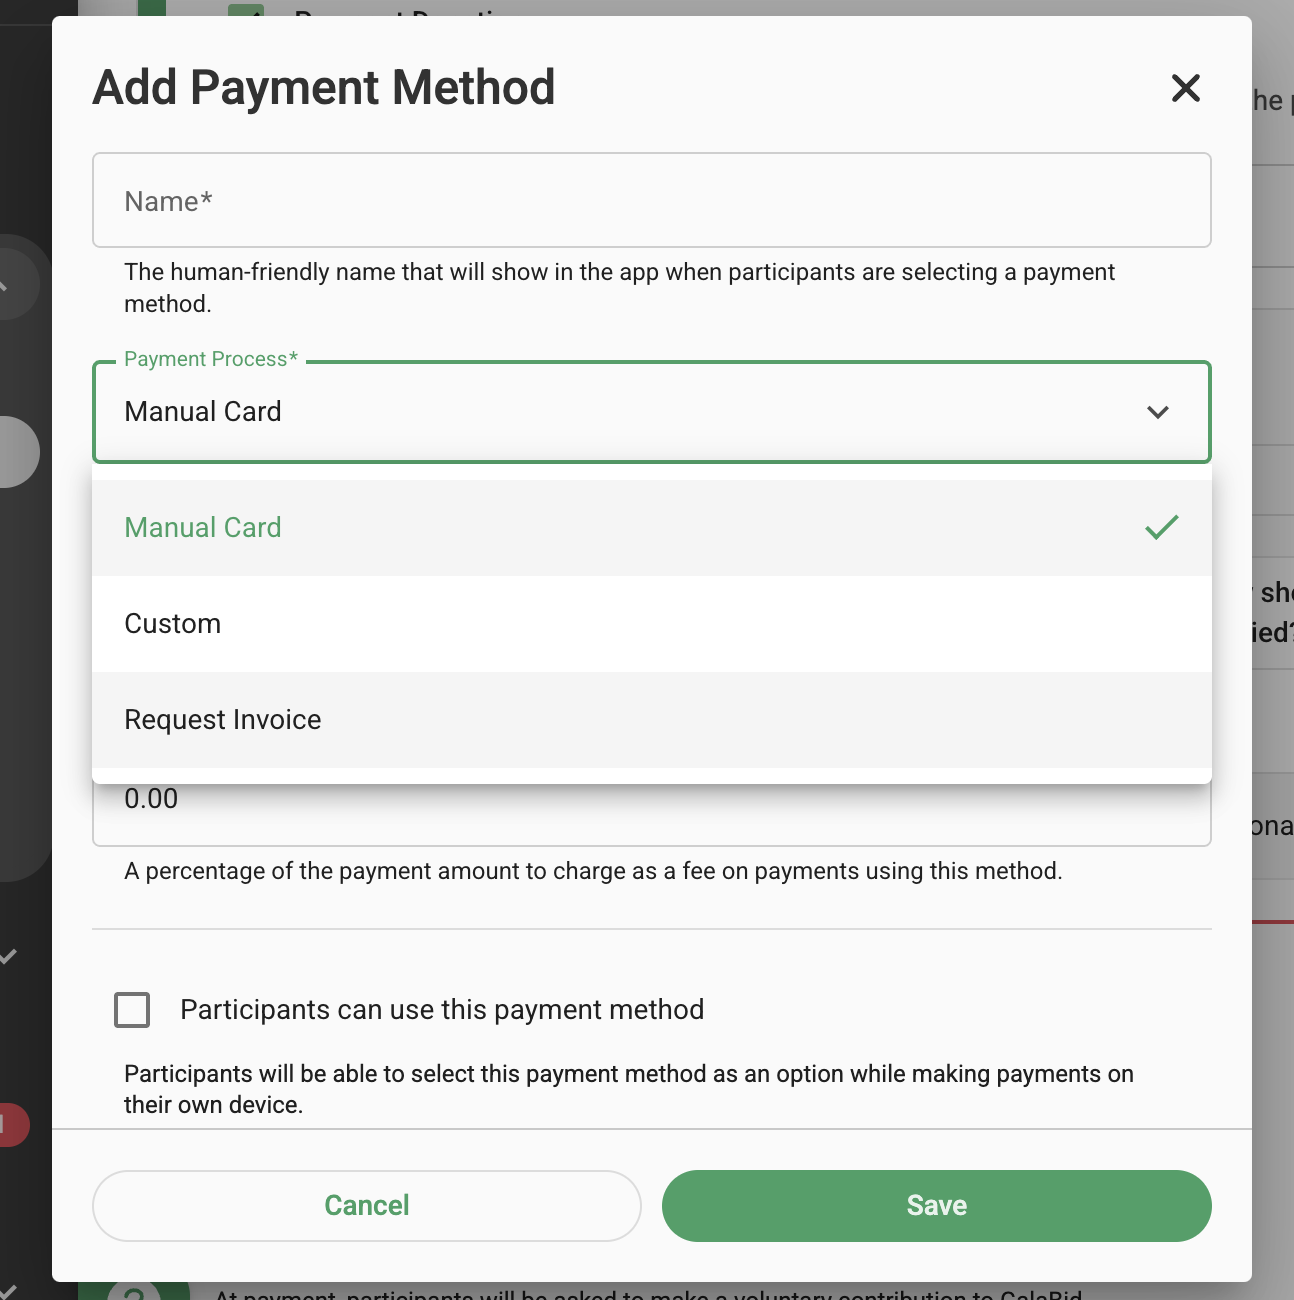
3. Save the payment method once added.
Step 2: Enable Invoice Requests on a Specific Ticket
1. In the left-hand menu, click:
Ticketing & check-in → Tickets
2. Find the ticket you want to edit and click the pencil icon to open its settings.

3. Tick the checkbox:
Allow purchasers to request invoice
When participants request tickets using Request Invoice, admins can choose how the invoice and payment are handled:
1. Manual Invoice: Select this option if you want to generate the invoice outside of GalaBid and send it directly to the participant. Payment is then handled outside the platform.
2. GalaBid Invoice: Select this option to have GalaBid generate the invoice. The invoice is added to the participant’s account, where they can view it. If you use the GalaBid Invoice option, make sure to edit the invoice template in setup > invoicing to include your bank transfer details or other payment instructions, as required. GalaBid only provides the invoice and does not handle the payment.
Regardless of whether you choose Manual Invoice or GalaBid Invoice, once you receive the payment, admins will need to mark the invoice as Paid in the checkout console to record the payment in the dashboard.
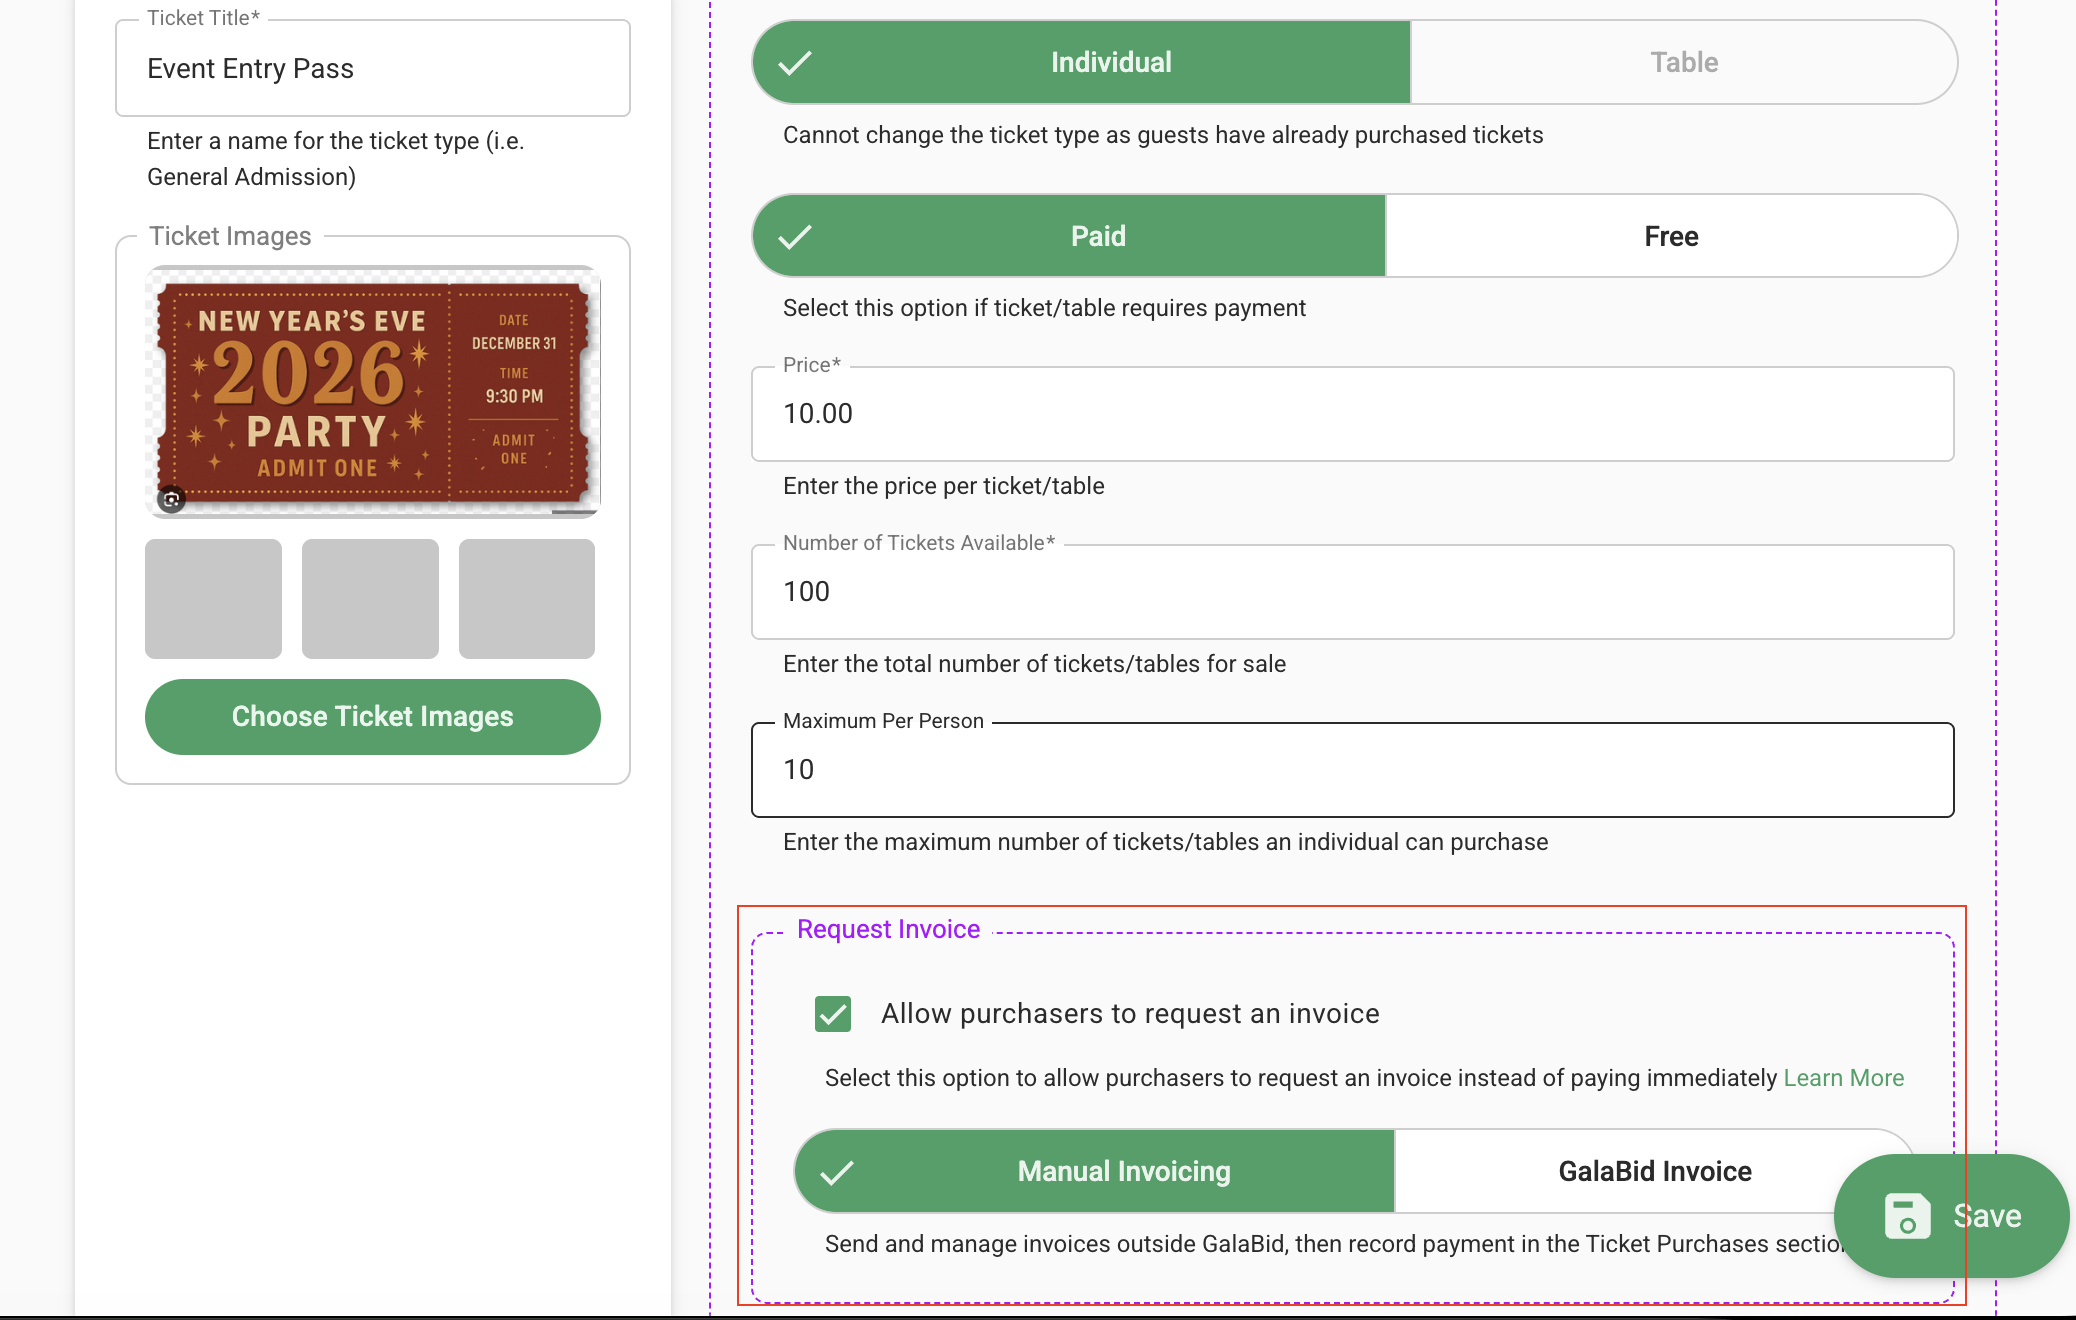
4. Click the green “Save” button (bottom right) to apply changes.
This is how it will look for ticket purchasers when purchasing the event tickets.
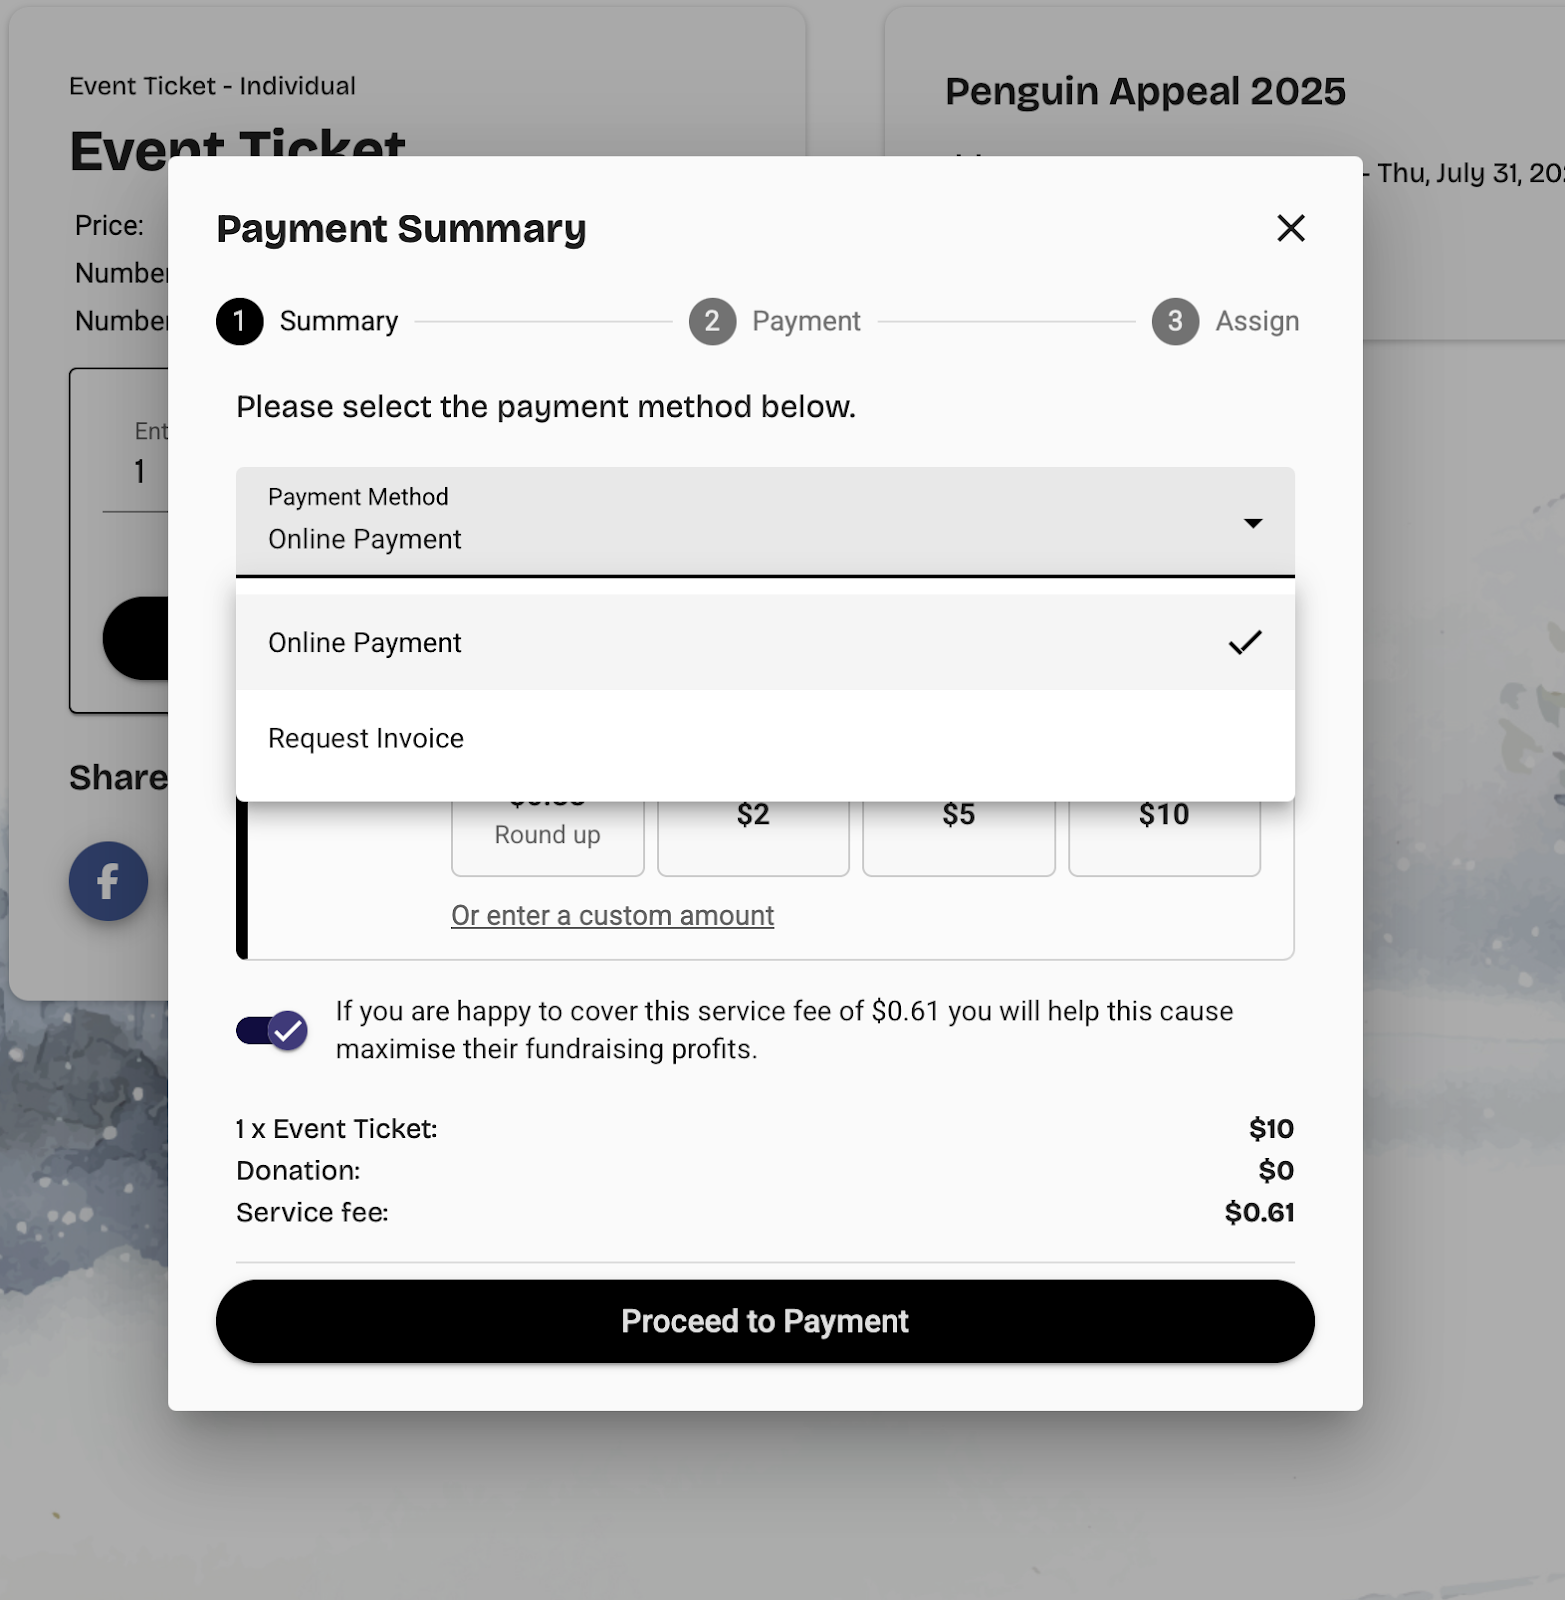
Once “request invoice" is selected and the ticket purchaser has selected proceed to payment they will receive this confirmation on screen.